When I published the Feather & Fan-tastic pattern, I chose to make it available in 3 sizes that I called S, M and L. However, these sizes might not necessarily correspond to your usual sizes – it was just a naming I used to distinguish between them. The notes I added to the pattern:
Size: S/M/L
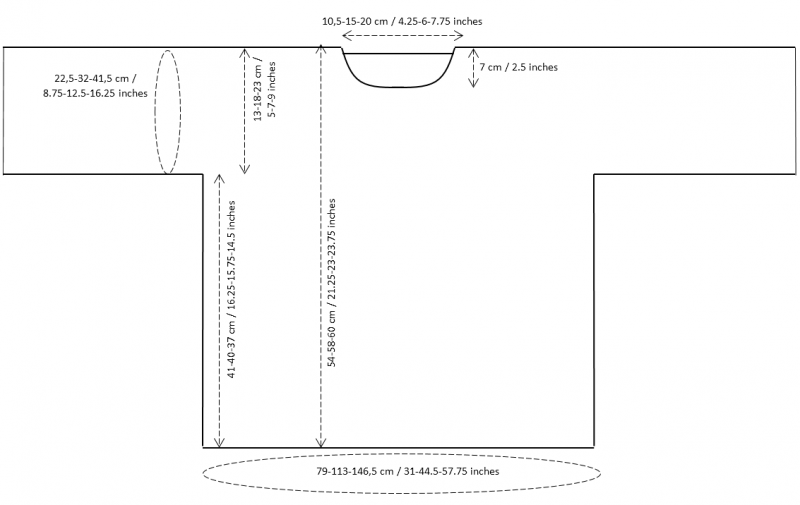
Actual garment measurements: 79-113-146,5 cm / 31-44.5-57.75 inches.
Garment is intended to be worn with quite a bit of positive ease: 10-15 cm /4-6 inches is recommended.
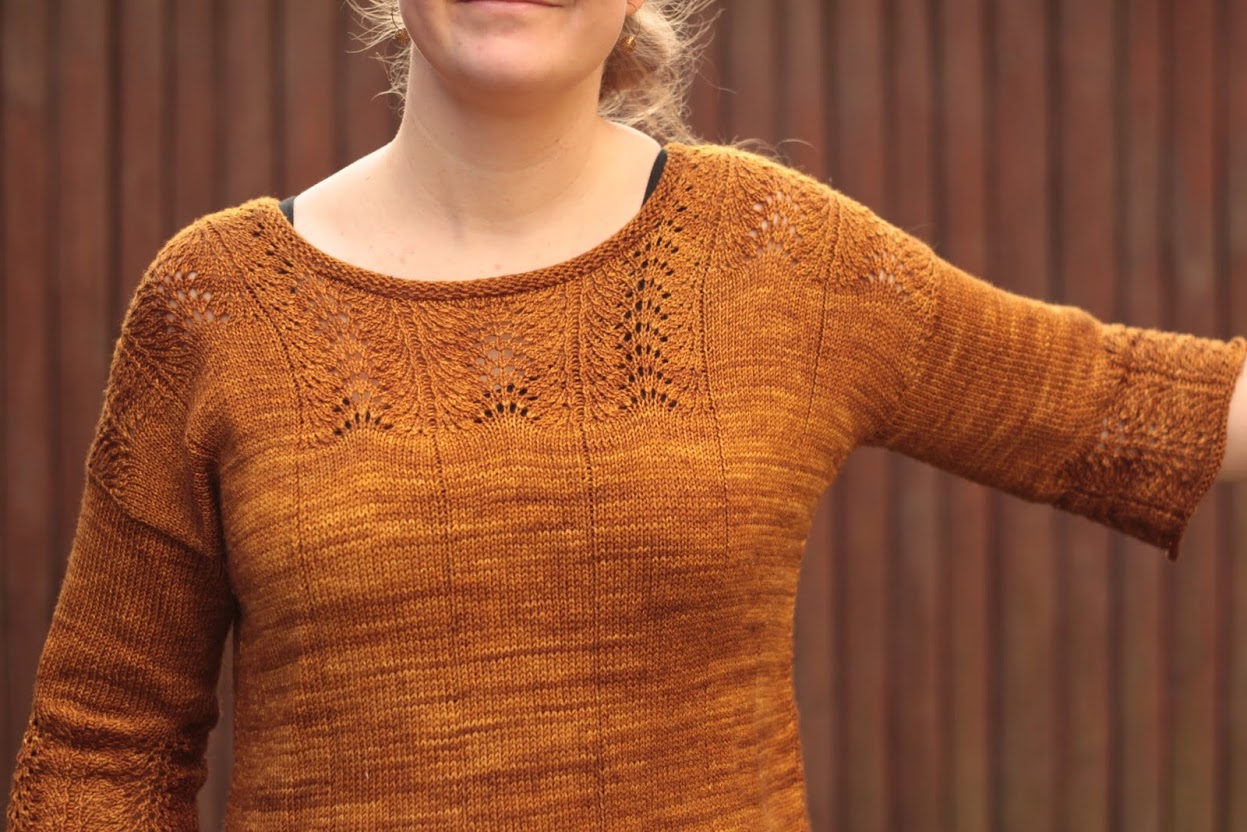
Sample shown is size M on a 94 cm / 37 inch bust.A note on sizes:
There are only 3 sizes between which the span is pretty large – this is because of the nature of the Feather & Fan pattern and the number of repeats. You can’t just size the pattern up or down by adding or subtracting a number of repeats. However, some testers have successfully substituted heavier yarn weights (and larger needle size), thus scaling up one of the sizes given. Check your gauge before you begin, so you can calculate the final size!
As people have been asking, the longer explanation is:
In order to keep the garment looking the same in different sizes, I calculated the sizes upon a modification of the feather & fan pattern (being a repeat with either 4 holes, 6 holes, or 8 holes). There is a difference of 6 stitches per size – and with the lace pattern being repeated 7 times across the garment, the total difference in width is 42 stitches. For bust circumference of the sweater that makes 84 stitches difference per size!
Yes, I did think about doing the grading for different sizes in another way, by for instance omitting a repeat of the feather & fan pattern or adding one. But doing that would affect not only the width of the garment, also the size of the neck opening and the final look of the sweater. It would complicate the pattern too much too my liking, so I chose this method.
However, there are ways to get around these very limited sizes!
Beware: Math coming up!
These are the measurements of the sweater if you work it exactly as in the pattern:

A couple of my testers have done gauge substitution by choosing a heavier weight yarn and working a smaller size. The calculations are made like this:
The pattern requires a gauge of 25 sts over 10 cm / 4 inches. Let’s say you swatch and find that your gauge is 20 sts over 10 cm / 4 inches. Your calculations will be:
25 (pattern stitch gauge) / 20 sts (your stitch gauge) = 1,25.
divide the pattern stitch gauge with your stitch gauge.
This means your gauge will give you a finished garment with a bust measurement that is 1,25 times as large as the one in the pattern.
So if you work the size S at this gauge, that would give you a final size of approximately 98 cm / 38.5 inches around the bust:
79 cm (pattern size) * 1,25 = 98 cm (your size at your gauge)
One note to be aware of: Substituting for a heavier yarn weight and changing the stitch gauge will also affect the row gauge. This means that if you follow the instructions with the number of repeats stated in the pattern, your neckline depth will become a little different as well. You might want to check that your neckline doesn’t become too deep by making that little calculation as well. The same as for the stitch gauge:
36 (pattern row gauge) / 30 (your row gauge) = 1,2.
divide the pattern row gauge with your row gauge.
Your neckline depth will then be 1,2 times deeper than the one in the pattern – in this case 8,4 cm / 3.25 inches.
It most likely won’t be a big issue, it’s just something you need to be aware of if you like your necklines to be at the high end. There are ways to remedy it; Work a couple less lace repeats over the shoulders, or add some extra rounds to the neckline finishing.
Personally, I used to hate swatching and found it the worst chore ever. But in situations like these, I am happy that it is an option!
Take a look at the Ravelry pattern page for Feather & Fan-tastic, or you can directly buy the pattern right here.

