To go directly to the instructions for making your own big blankie, click here!
The person who taught me to knit, my mother’s mother (Oma!), is turning 95 today. She hasn’t been knitting for years, but it used to be a very big part of her life, and she used to knit sweaters for all of us. With 3 children and 10 grandchildren, she was occupied! ;)
For her 90th birthday (I think – or was it the 85th? In any case, some years ago!) we did a “fashion show” showing off all the creations Oma had made – and there were many! All children’s garments have been passed down from grand kid to grand kid, then great grand kids, and they probably have many years in them yet.
When my sister announced that she encouraged people to think of entertainment for the afternoon of the birthday party a couple of weeks ago, she prompted me to think about the knitting that Oma and I have in common. I’m not entirely sure, but I think I’m the only grand kid who knits regularly (at least in the extend that I’m doing!), so really that should be me, right?
The activity should contain the following: Knitting with Oma, involving other family members, and making a usable result.
So the idea formed: To knit a big blanket, out of thick yarn, with thick knitting needles! It should be fun, involve Oma, and also keep others entertained.
My thought was to have two people each holding a giant knitting needle, a third controlling the yarn, and Oma telling them what to do. Should be doable, right? Oh, and it needed to be done on the day, so Oma could bring the blanket home straight away…
So I went in search for thick yarn and big knitting needles. Initial idea: Buy some of those giant skeins of yarn and using broom sticks or the like to knit on. But looking at the thick yarn online, prices are going through the roof for that…
Some googling brought me to pages where the suggestion was to make your own thick yarn by making an i-cord of existing, thinner yarn. The alternative would be to use multiple strands of a yarn, and I thought that would become too messy, with so many people involved. Also – I wanted it to become pretty. Oma has a sense of quality, so it needs to look nice and feel nice! Wool, no cheap acrylics or such!
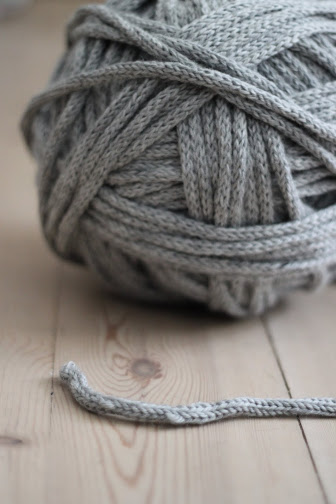
First, though: No way in h*** that I would be knitting enough i-cord on a couple of knitting needles. So I went in search of alternative methods – first starting with the manual little knitting dolly, then discovering a quicker method: An i-cord machine!
I found a used one online for cheap moneys, and here’s the Instagram video I posted of it a couple of weeks ago:
Awesome, innit?
I bought 20 skeins of one of my favorite heavy duty yarns – good quality, 100% wool, superwash, keeps it’s shape, and relatively cheap in this part of the world – Drops Karisma. In a color that I hope goes with all Oma’s furniture, and is neutral enough to go with anything else over time. It makes for a total of 1 kg, each skein (50g) being around 100m, and I thought that should prove quite enough.
Making the first skein into i-cord, I had 7 meters… Which would make my 20 skeins amound to around 140 meters of i-cord. Should be enough for a big big blankie, eh?
Each 50g skein took about 20 mins to turn into i-cord. So processing all the yarn into i-cord must have taken… just under 7 hours! (I didn’t time this, and I didn’t do it all in one stretch – it took me around 3-4 evenings to get it done)
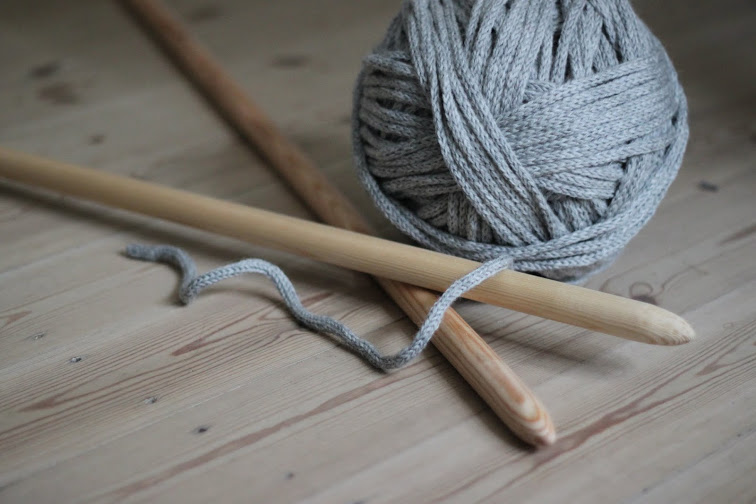
As for knitting needles… Broom sticks might be a bit unhandy and I would have to rely on broom sticks being available on site of the party. Perhaps not that handy (and not super pretty either ;)). So I was on my way to the DIY store to get a thick rod to make knitting needles of, when I discovered a rod from an earlier project standing in the corner of my living room. Roughly 2 meters of a 22mm diameter rod = roughly 1 m long knitting needles, size 22mm! It took around 15 mins to make those.
Once the yarn and needles were finished, I started knitting. I mean – if I wanted this blanket to be done and ready to bring home on the day itself, I would need to make a start on it, yes?
So I cast on and started knitting. That’s heavy work on your own! And not for my wrists, no – for my arms and shoulders. But fun, so fun! I’ve never had knitting that grew bigger so quickly :D
I actually had a hard time putting it down. But when I got to about halfway through using all the yarn, I had to stop myself – there should still be a bit to work with on the day itself!
On the day, there were a lot of activities and things to show, and my blanket was only a little part of it. But I had Oma knitting with a couple of her great grand kids, just one row, and then I took over again myself.
I don’t have any photos of it in action though, which I’m a bit bummed about – but someone did take photos of me knitting on the blanket!
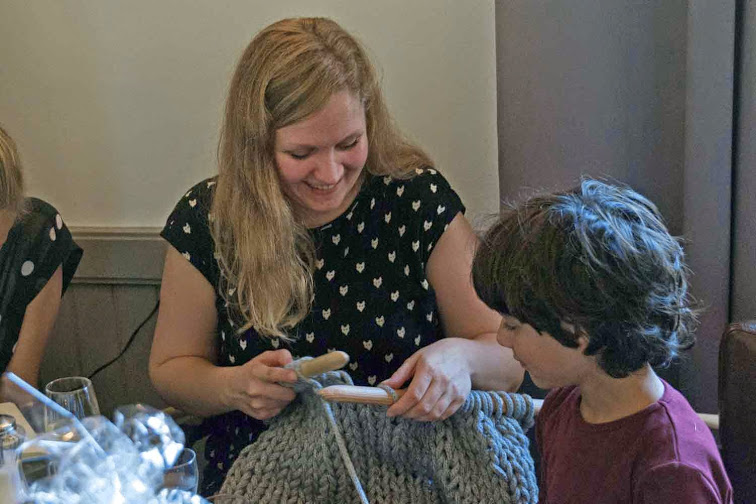
(I had a little helper right there. He was really good at wrapping the yarn around the needle, and it actually went a lot quicker with him doing that part!)
I finished it there, while it was also still light out, and gave it to Oma. She was happy, but also very overwhelmed with the whole day.
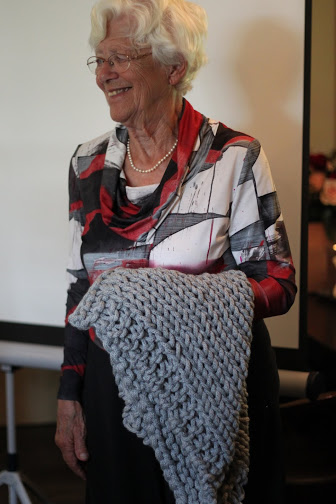
Ain’t she looking good for a 95-year-old? :)
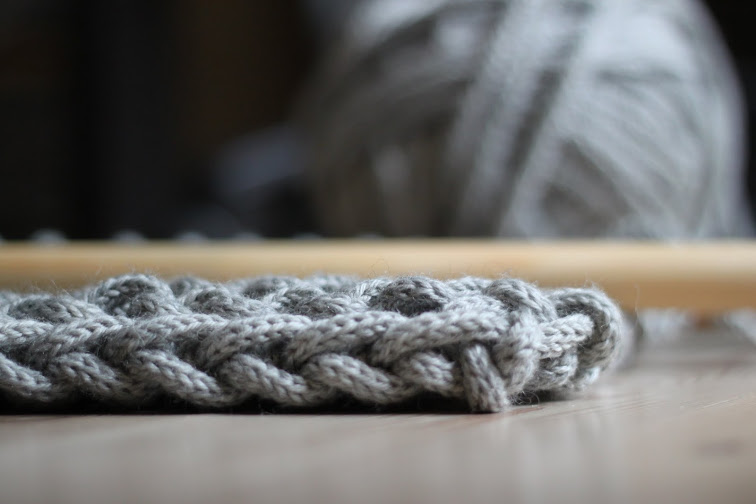
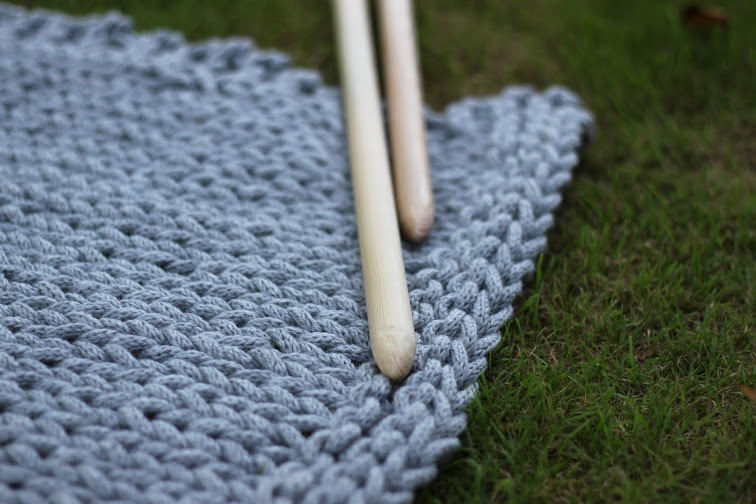
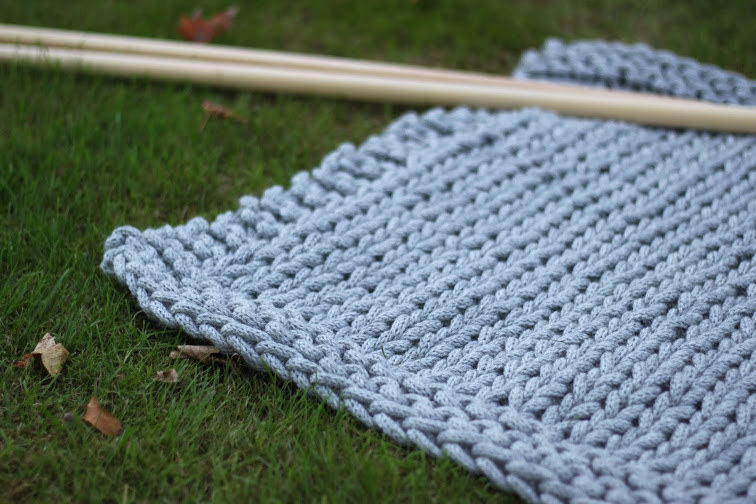
Here are some shots of the blanket, finished and all:
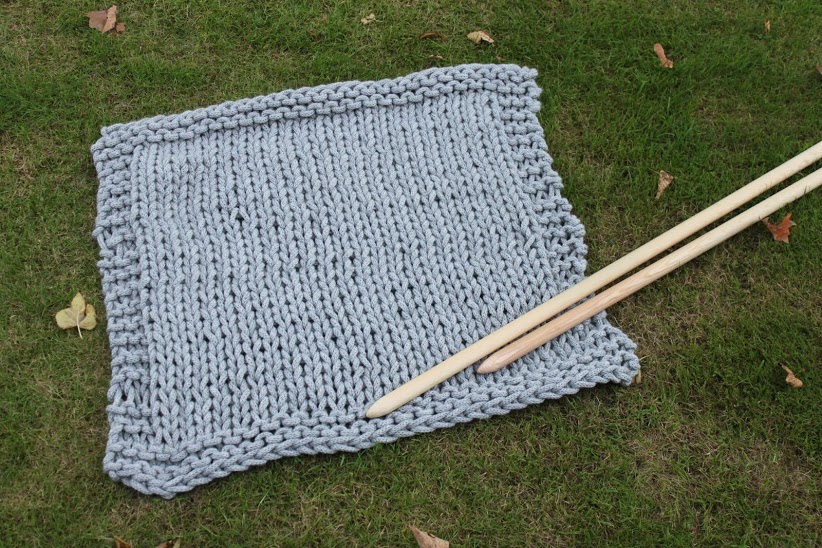
If you didn’t know the size, you’d think it was just a gauge swatch. It makes me giggle a bit!
Now I want one for myself. Who wants to volunteer to make the i-cord, please? :D
Big yarn blanket
Approximate size: 70 cm / 27.5 inches (width) x 50 cm / 20 inches (length).
You will need:
- around 140 m / 155 yards of i-cord yarn.
To make your own:
– approximately 2000 m of DK weight yarn
– an i-cord machine (or 4mm / US 6 DPNs, if you’re crazy enough to knit the i-cord by hand!) - 22 mm giant knitting needles
To make your own:
– a rod of a diameter of 22mm / 7/8 inches, a length of 2m / 6.5 feet.
– a saw, a sharp knife, and some sanding paper.
Make the i-cord into one big ball of yarn – if you have several lengths (the i-cord maker doesn’t take 1kg in weight!), graft them together. It doesn’t matter if it is done seamlessly or not, as long as you don’t make big knots – small flaws won’t be visible in the blanket.
If you don’t have giant knitting needles yet, make them by sawing the rod in half, use the knife to make one end pointy, and sand them to make it snag free.
To knit:
Weigh your yarn and make a note of how much you have!
Using the crocheted provisional cast on (for a nice looking edge that will resemble your bind off edge), cast on 30 stitches. Use your working yarn to cast on with, as it won’t be unraveled at the end (like all tutorials show) – and use your hand as the “crochet hook”. Place the “crochet hook loop” on the needle as the last (30th) stitch.
Knit 4 rows in garter stitch (knit every row).
Weigh your yarn again, and note how much you used for this first part. You’ll be needing just as much to finish off the blanket in the end! I had used about 150g.
Work in pattern:
Right side row: knit across.
Wrong side row: knit 3, purl until 3 sts remain, knit 3.
Continue in pattern like this, weighing your yarn periodically, until you have as much yarn left as you used for the cast on and garter stitch border. Make sure to end with a wrong side row.
Now work 4 more rows in garter stitch, and bind off from the right side.
“Weave” in the ends by tucking them in around the garter stitch border. If you have the nerve (and patience!), wash your blanket and let it dry flat. It’s thick and heavy, so this will take ages! Don’t say I didn’t warn you.
Tadaaa, you got your very own huge blanket!